name your IP
Dynamic DNS
When you connect your router to your Internet Provider it gives the router an IP Address that is used by the rest of the Internet to idenify your router. This IP Address can change each time you connect as most Providers use Dynamic IP Addresses. If you wish to access your router (or network) from the Internet then you must know this IP Address and know when it has changed.
Dynamic DNS ( DDNS ) is a service that gives your IP Address a name so you can access your router using a URL. It keeps track of your IP Address's changes so the URL always points to your correct IP Address. In order to use DDNS you must be subscribed to a DDNS Service Provider and set up your router to use that service.
Go to the Services menu and the Dynamic DNS submenu.
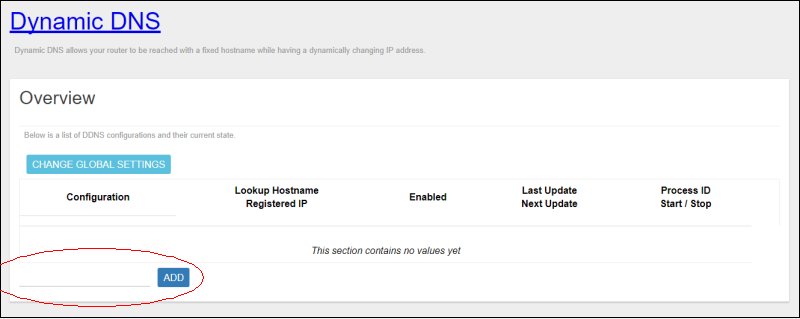
To create a new DDNS configuration, enter its name on the line and click the ADD button. This will take you to the Details page where you do the configuration.

There are 4 tabs for configuration on this page.
Basic Settings
The first step is to set your DDNS Service Provider.

Select your Provider from the dropdown box. If your Provider is not present in this list you will have to do a custom setup. This will be explained later.
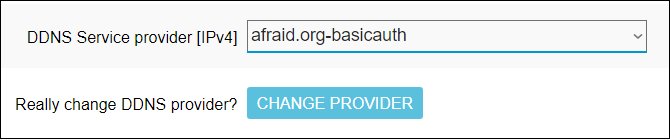
Click on the Change Provider button to select your Provider.
When you subscribed to the DDNS service you would be given a Domain Name, a Password and possibly a User Name. These need to be entered now.
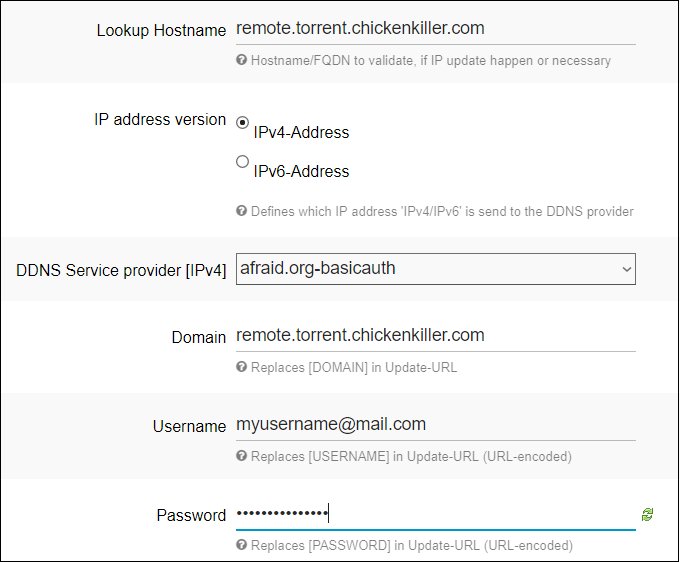
Lookup Hostname and Domain are the Domain Name you were given by the Provider. The Username and Password are also those given to you by the Provider. If you do not need either a Password or Username you must still enter something in those fields. Any character will do.
Warning : You can not use the dash { - ) in any of the entries in this section.
Custom Setup
If your DDNS provider is not in the dropdown list you must do a custom setup for it. Select -- custom -- in the DDNS Service Provider dropdown box and click on the Change Provider button if necessary. A new set of entries will appear.
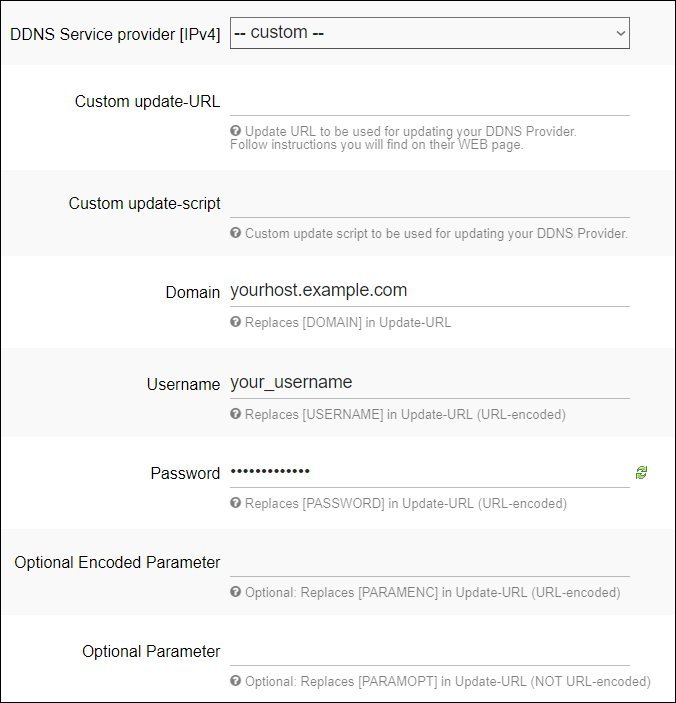
The Custom Update-URL entry must be filled in with the URL needed to do the DNS update with your Provider. This URL will include your Domain Name, Username and Password. It is used to send an update request to your DDNS Provider.
Along with the Custom Update URL you must also enter the Lookup Hostname, the Domain Name, the Username and the Password as shown in the above section. These entries will be placed in the Custom Update URL before it is sent to the DDNS Provider.
You should be provided with the Custom Update URL by the DDNS Provider and it will look similar to the following.
- http://[USERNAME]:[PASSWORD]@freedns.afraid.org/nic/update?hostname=[DOMAIN]&myip=[IP]
- http://[DOMAIN]:[PASSWORD]@dyn.dns.he.net/nic/update?hostname=[DOMAIN]&myip=[IP]
- http://api.dynu.com/nic/update?hostname=[DOMAIN]&myip=[IP]&username=[USERNAME]&password=[PASSWORD]
Your Domain Name, Username and Password entries will be subsituted for [DOMAIN], {USERNAME] and [PASSWORD] respectively in the Custom Update URL before it is sent to the Provider. The [IP] entry will be automatically replaced with the IP Address of your router.
Advanced Settings
Here you set the interface that is providing the Internet connect you wish to use DDNS on.
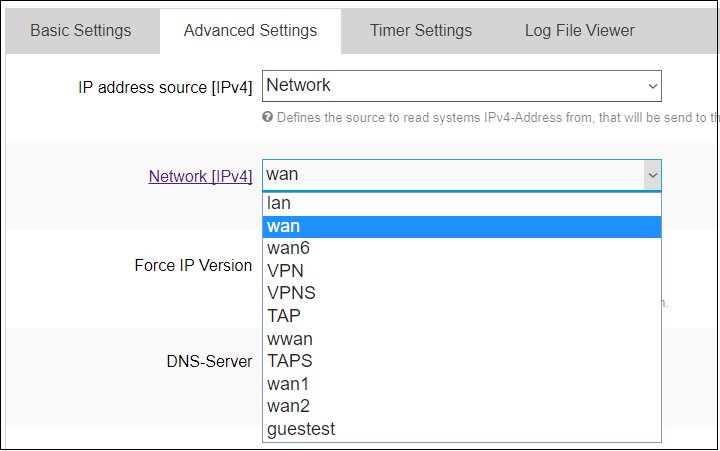
- WAN is wired Internet via the Wan port.
- WWAN is a Wifi Hotspot.
- WAN1 is Modem 1.
- WAN2 is Modem 2.
Select the proper interface from the Network dropdown box. The interface must be connected to the Internet at this time so the current IP Address of the Domain Name came be gathered.
Timer Settings
These are the values used to check for a change in the IP Address of the router and to force the DDNS provider to change your DNS.
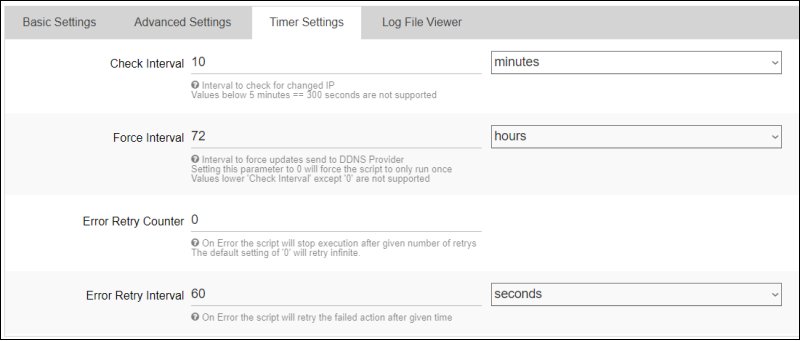
- Check Interval is the amonut of time between checking for an IP Address change.
- Force Interval is the amount of time between forcing the Provider to change the DNS entry of your URL.
Depending on how often your IP Address changes, you may wish to shorten these intervals.
When you have completed making your changes, click on Save&Apply. This will return you to the Overview page.

In order to use your DDNS configuration you must enable it by checking the Enabled box for it and then clicking on Save&Apply. The Start button will then appear. Clicking on this will start the DDNS process and update the IP Address of your domain name.
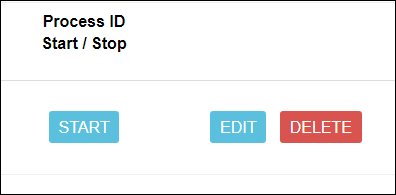
Clicking on it again will stop the process.
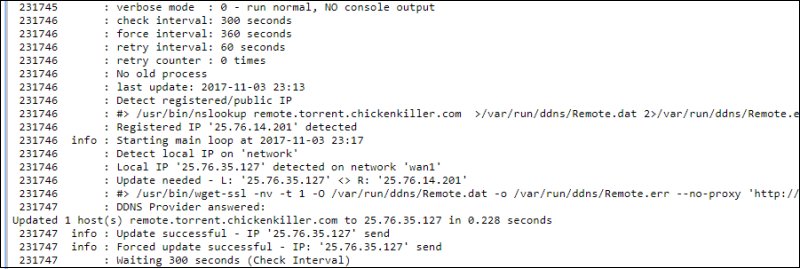
After you have started the DDNS process you can see the results by clicking on its Edit button and then on the Log File Viewer tab. Click the Read/Reread Log File button to refresh the log display.