network printing
Setup a Print Server
Routers using the 16meg ROOter firmware have support in them for a Network USB Printer. This allows you to plug a USB printer into a ROOter and then access it from your computer using the network.
Here we will show how to set up Windows to access this printer.
Printer Setup
Before you can use a USB printer in a ROOter you must first enable the Print Server. On the router's Web interface go to Services and then to Print Server.
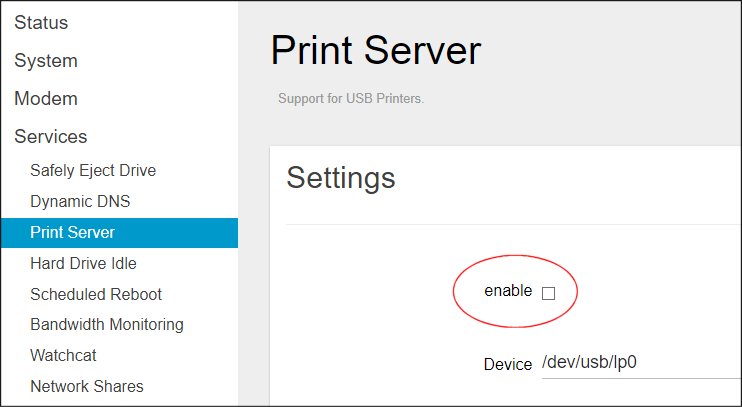
Check The box labeled Enable and then click on the Save&Apply button. Plug the printer into the router's USB port and it is ready to go.
Add a Printer to Windows
With the printer now available on the Network we must set up Windows so it can use it. Go to Control Panel and select Devices and Printers.
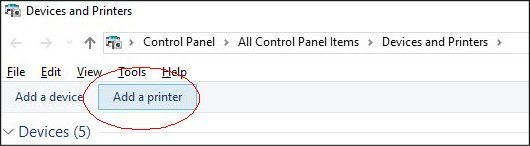
Click on Add a printer.
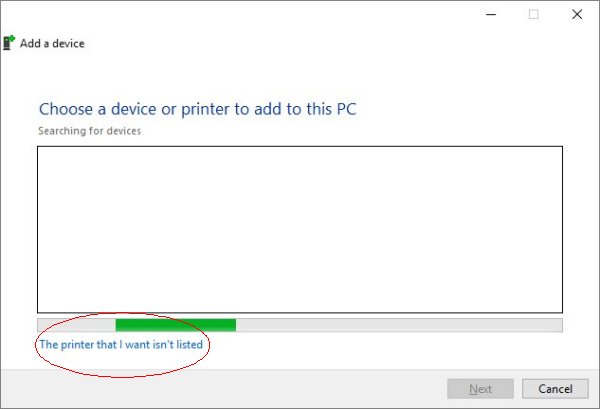
While Windows is searching for a printer click on the isn't listed link.
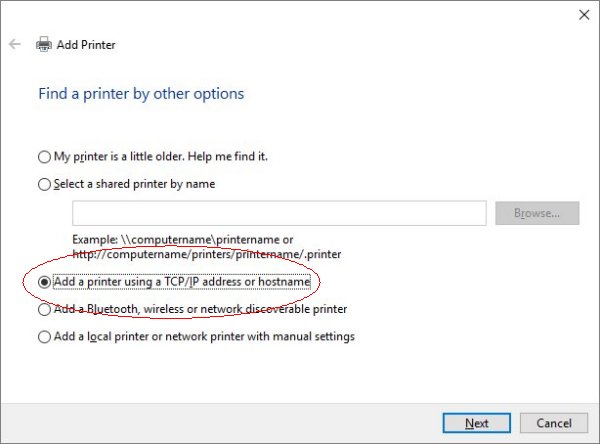
Select the Add a printer by IP Address and click on Next.
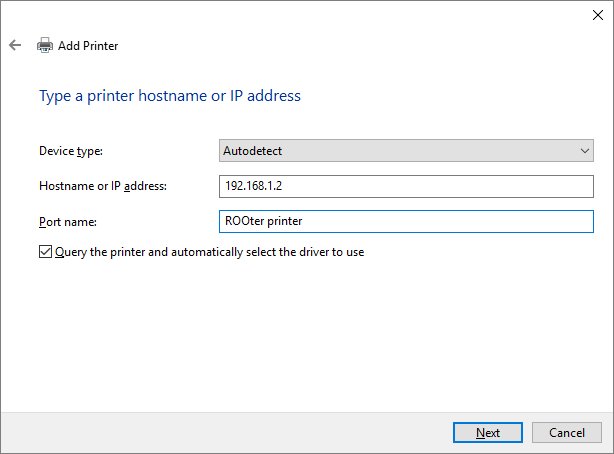
Enter the IP Address of the router into the IP Address box. In this case it is 192.168.1.2 although by default it will be 192.168.1.1.
The Port Name is the name you wish to call this printer. It can be any name. Click on the Next button.
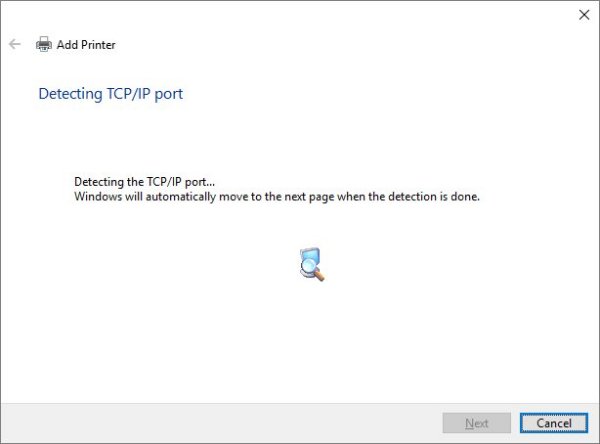
Windows will then spend some time finding out which port to use with the printer. This port was set on the Print Server page of the router and is 9100 by default. When done, Windows will move to the next page.
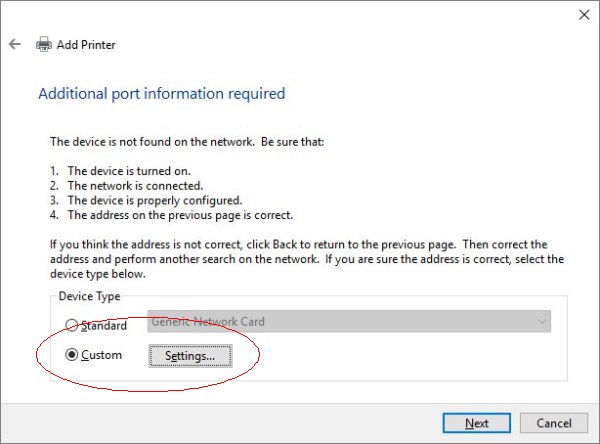
Check the Custom option and then click on the Settings button.
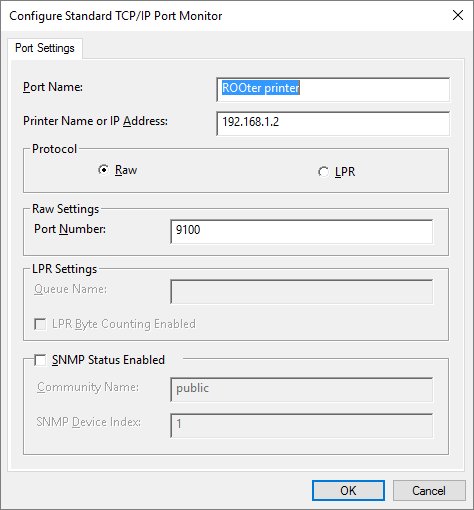
Confirm that the data shown on this page is correct, which it should be. Then click on OK.
When you are returned to the previous page, click on Next.
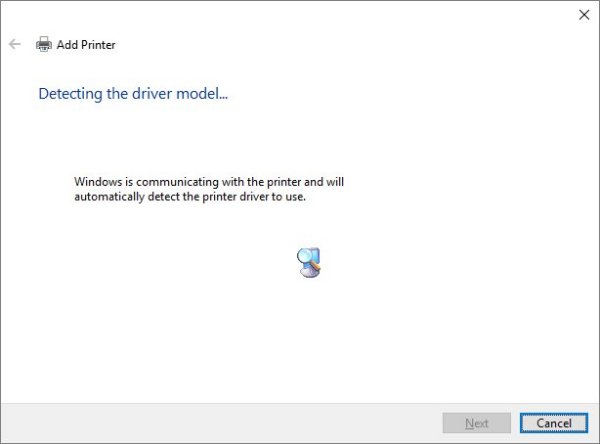
Windows will attempt to detect which printer driver to use. It will then move to the next page.
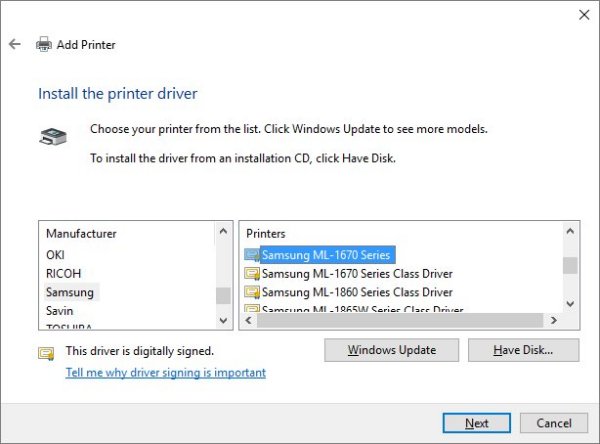
Select the Manufacturer and the Model of your printer from the list. If your printer is not listed then click the Windows Update button to get more models. If you have the installation disk for your printer then click on the Have Disk button.
When the selection is done, click on Next.
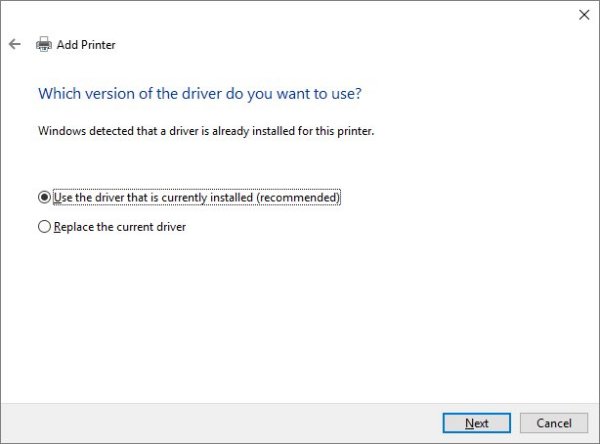
Follow the instructions about which printer driver to use and then click on Next.
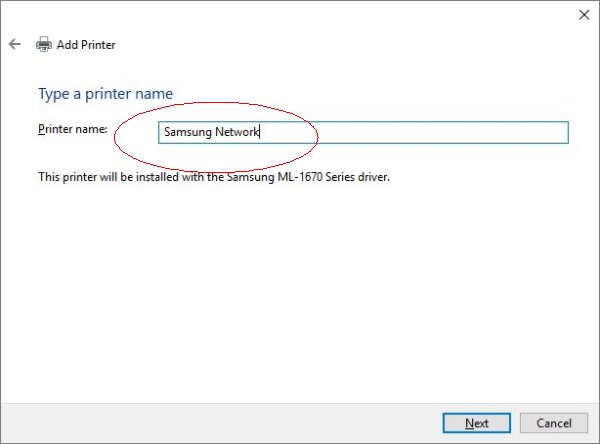
Enter the name of the printer that will be used when you select it from the other Windows programs. Then click on Next.
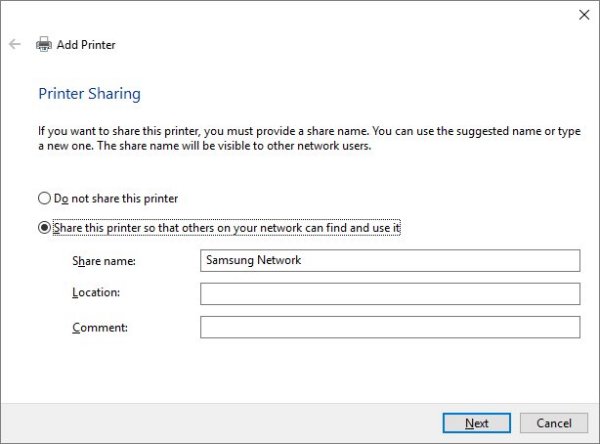
Select to Share this printer so the devices on your Network can access it. This is important. Then click on Next.
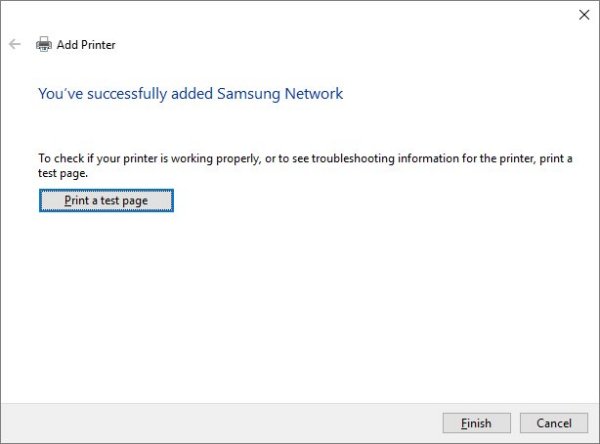
If desired, you can test if the printer is accessable by printing a test page. Then click on Finish.
You have added a Network Printer to Windows so you can print to it from your computer.