VPN
VPN using Wireguard
A Virtual Private Network or VPN extends a private network across the Internet and enables users to send and receive data across this connection as if their devices were directly connected to the private network. The connection is encrypted for greater security and is known as a tunnel.
A VPN Server sits at one end of the tunnel with a VPN client at the other end. A VPN Server can have multiple tunnels to multiple VPN clients.
Commercial VPN Services
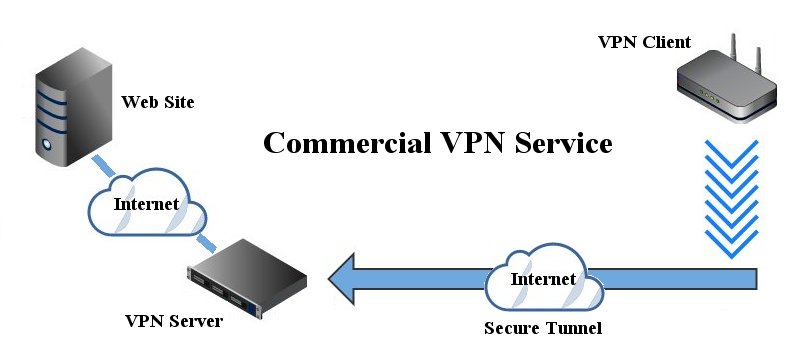
For many people, using a VPN means connecting to a commercial VPN Service. The main reasons for this are web browsing security and geolocation. A commercial VPN Service will provide Internet access for the client from their VPN server.
A VPN connection between your router and a commercial VPN Service is encrypted using nearly impossible to break ciphers so no one will be able to snoop on your data packets and see what you are doing or where your are looking. This means that web browsing is much more secure, anonymous and is hidden from your ISP and others.
Geolocation is another benefit of using a commercial VPN Service as any web sites you visit will think you are located where the VPN server resides and not at your actual location. This can allow you access to web sites that you normally couldn't use because you are not located in the correct country.
Private VPN Network
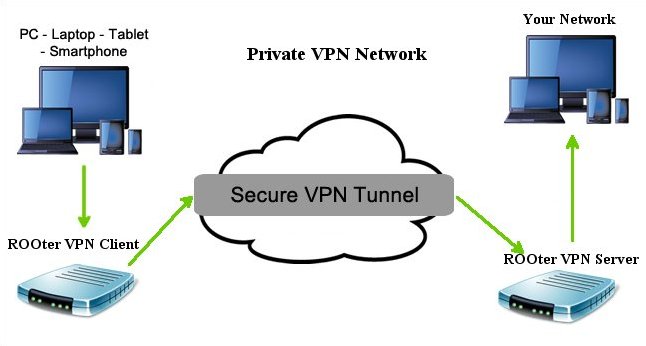
A private VPN network differs from a commercial VPN service as it may or may not allow its clients access to the Internet from its location. Instead, it is designed to allow remote clients secure access to the server's network through the encrypted tunnel.
Wireguard Client
While technically there are no clients nor servers in Wireguard, as it’s all peers, for the sake of readability I will use terminology similar to OpenVPN.
A Wireguard client is used to connect to a Wireguard server located on another computer. The client receives information from the server on how to configure itself so it can make the connection. The client can be configured manually or by using a conf file from the server. Commercial VPN services use conf files as they are easy for the client to use to configure itself. Private Wireguard servers may or may not use these files but may instead send the information needed to manually set up the client
To set up a Wireguard client go to the VPN menu and the Wireguard sub menu.
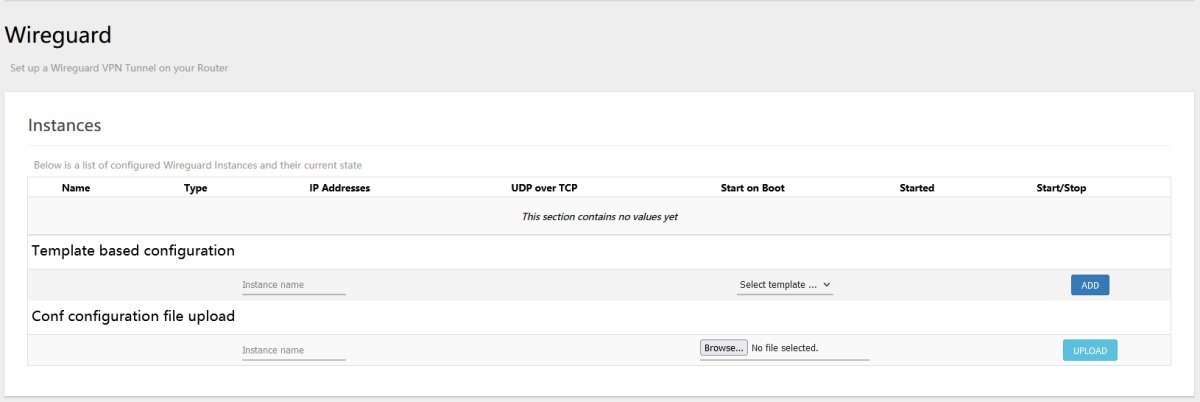
You can have multiple Wireguard clients or Servers defined on this page but only one client and one server can be running at any one time. Each client or server is known as an Instance.
To create a client using a conf file from a VPN service or from a Wireguard server you use the Configuration File Upload section.

Click on the Upload button and your Client Instance is created.

At this point the client is ready to connect to the server. Just click the Start button for this Instance and it will be running. By default these Instances are not set to automatically start running when the router boots up. If you wish this to happen then click on the Edit button for that Instance.
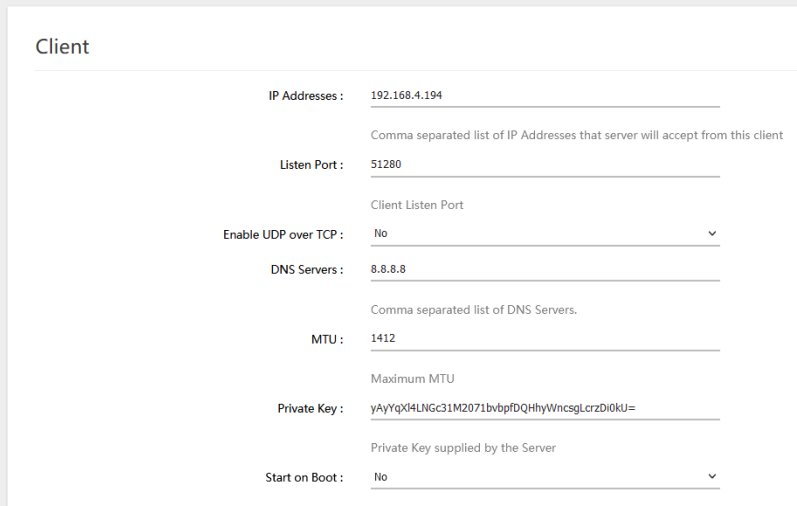
Here you can set the Start on Boot flag to Yes. Click Save&Apply when you are finished. The rest of the information should be left alone as it is tailored to the server.
You can also manually create a client Instance using the Template Configuration section.

Give the Instance a name, select Wireguard Client from the dropbox and click on the Add button. A new client Instance will be created with some default values in it. Click on the Edit button to change the values to suit what the server has sent you.
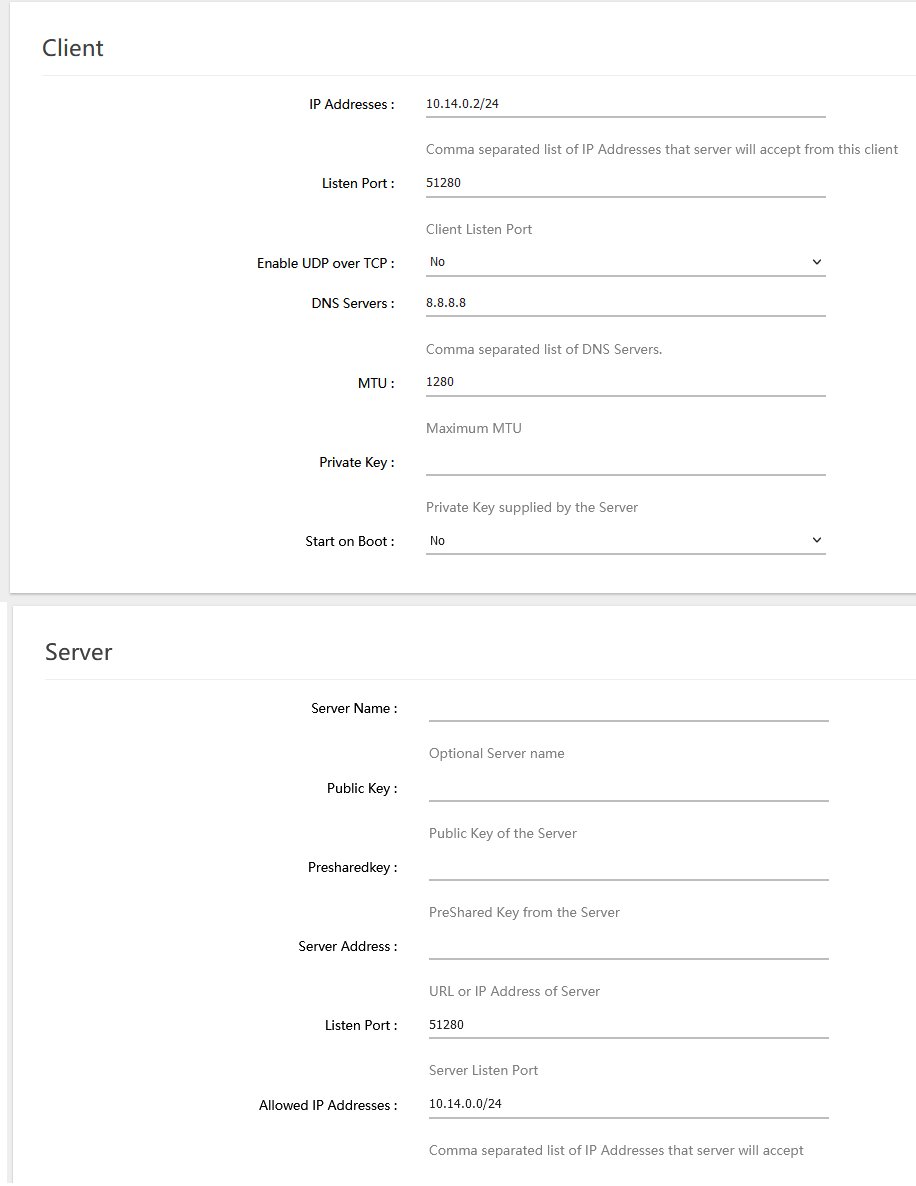
Make your changes to the information and click Save&Apply when you are done. Just click the Start button for this Instance and it will be running.
Wireguard Server
A Wireguard server would be used if you want other remote users to have secure access to it's Network. A server must be set up manually using the Template Configuration section. Give the Instance a name, select Wireguard Server in the dropbox and click on the Add button.

The new Instance for server will be created with some default values. Click on the Edit button to do the server configuration.

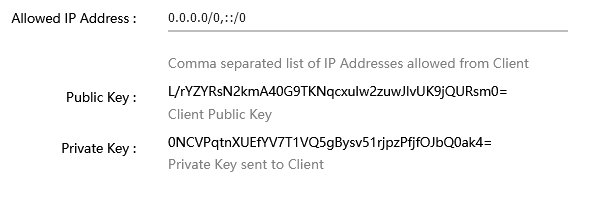
The server is created without any clients so after you seet up the server portion you need to add clients by clicking on the Add button in the client section.
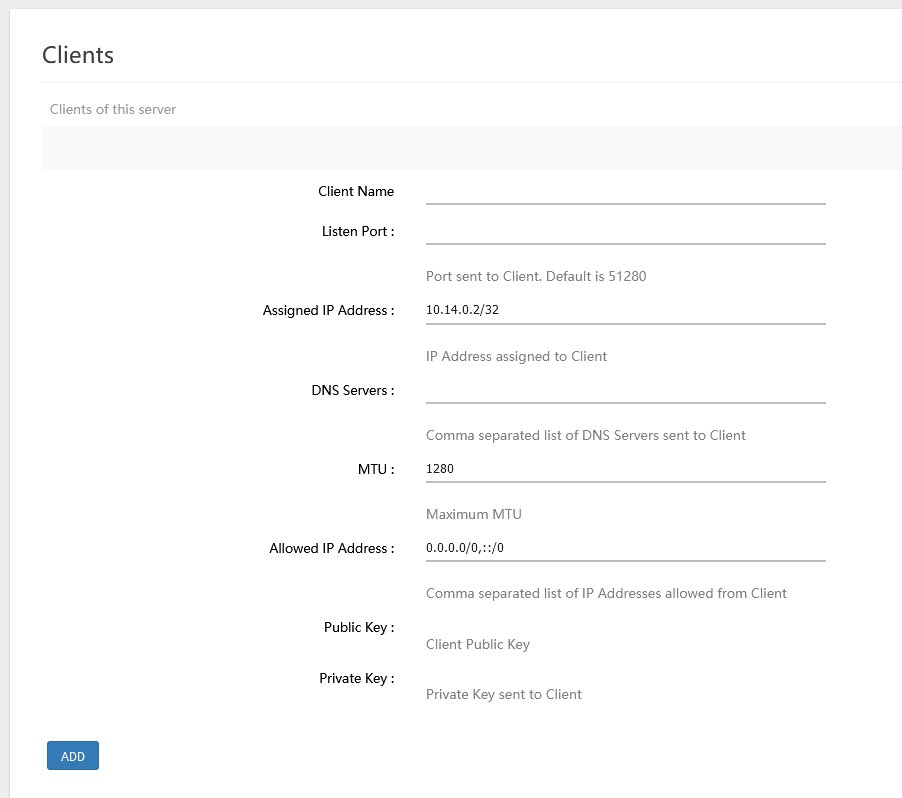
Enter the information for the client and the click Save&Apply. At this point the keys for the client will be generated.
The last step is to generate a conf file for all the clients you have added. Click on the Generate Conf Files button in the Server section. This will create a single archive file named wgconf.tar.gz which will be saved on your computer. Inside this archive is a text file named wg.conf that contains all the conf information for each client.
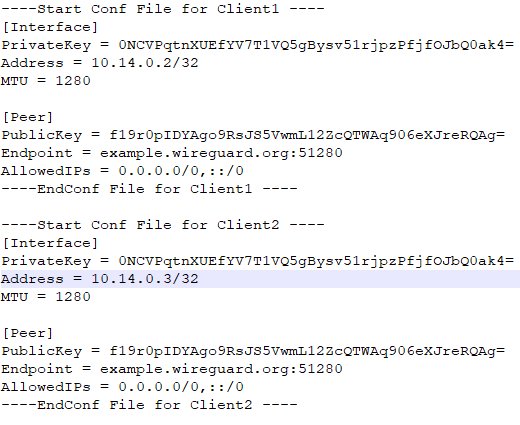
Copy and Paste from this file to create conf files for all the clients.
The last step is to start the server running so the clients can connect.